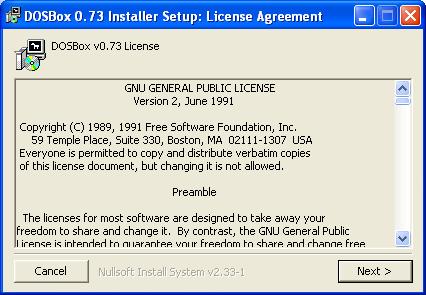
(Natürlich muss man die Lizenzvereinbarung akzeptieren)
Wie installiere ich QBasic in der DOSBox?
Von Vincent Krautwald (Mail: punker_1992@live.de ), Stand 1.7.2011
Einleitung
DOSBox ist ein Freeware-Emulator für x86-Systeme, der das Betriebssystem DOS und die in dessen Ära gebräuchliche Hardware nachbildet. Ziel ist das Ausführen älterer, DOS-basierter Software wie Qbasic und alte Spiele, die mit modernen Computersystemen nur eingeschränkt oder gar nicht kompatibel sind. Die 64-Bit-Varianten von Windows 7 sind z.B. gar nicht mehr in der Lage, 16-Bit-Software ablaufen zu lasssen. Sämtliche DOS-basierte Programme sind dort daher nur noch unter einem Emulator wie DOSBox ablauffähig. DOSBox gibt es für viele Plattformen, unter anderem für Windows, Mac OS und Linux.
Näheres über DOSBox erfährt man auf den folgenden Webseiten
www.dosbox.com – Herstellerseite von DOSBox mit Downloadmöglichkeit
http://de.wikipedia.org/wiki/Dosbox - Wikipedia-Artikel
www.wintotal.de/artikel/artikel-2010/9302.html/ - Alte DOS-Spiele-Schätze mit DOSBox wiederbeleben
Das vorliegende Dokument ist eine Anleitung zur Installation von QBASIC in der DOSBox 0.73.
Qbasic ist auf den MS-DOS 6.22 Installationsdisketten vorhanden.
Warum DOSBox 0.73? Ich habe mit der Version 0.70 begonnen. Die momentan aktuellsten Versionen sind einmal 0.74 und Hal's MegaBuild Version 6.
Meiner Meinung nach ist die Version 0.73 die bei weitaus stabilste. Mit der Version 0.74 gab es öfter Probleme. So passierte es mir zum Beispiel öfters, dass die DOSBox sich während eines Spiels, bei der Entwicklung eines Programms oder beim Ausführen eines solches selbst beendete oder einfach keinerlei Reaktion mehr zeigte. Der MegaBuild 6 basiert auf der Version 0.74 und weist somit ähnliche Probleme auf. Deshalb fiel meine Wahl auf die Version 0.73. Alternativ zu dieser Version kann ich auch den MegaBuild 5 empfehlen. Dieser basiert auf der Version 0.73 und bietet einige Erweiterungen wie zum Beispiel das Verbinden aus der DOSBox heraus in ein bestehendes Netzwerk mit IPX/SPX oder sogar TCP/IP.
Aber zurück zum eigentlichen Thema =-D.
Ich werde nach dem folgenden Schema vorgehen:
Die Installation von DOSBox 0.73 auf meinem System
Die Konfiguration!
Das Einfügen von QBasic
Eine grundlegende Information noch bevor es losgeht: Ich benutze ausschließlich das Betriebssystem Windows XP mit Service Pack 3.
Sollte es zum Beispiel Probleme mit der Konfiguration der DOSBox geben, so empfehle ich einen Blick in das Forum VOGONS (Very Old Games On New Systems). Dort dreht sich der meiste Inhalt rund um die DOSBox. Allerdings reagieren fast alle Nutzer und die Autoren der DOSBox allergisch auf Fragen, die nicht Spiele-spezifisch sind. Deshalb sollte man wenn nur im kleinen Maße Fragen über Programme wie Qbasic stellen =-).
Nun beginnen wir aber endlich. Los geht es mit dem erstem Part:
Die Installation von DOSBox 0.73 auf meinem System
Zunächst einmal sollte man sich das Programm herunterladen, dazu auf www.dosbox.com
im Download-Bereich einfach die richtige Variante raussuchen.
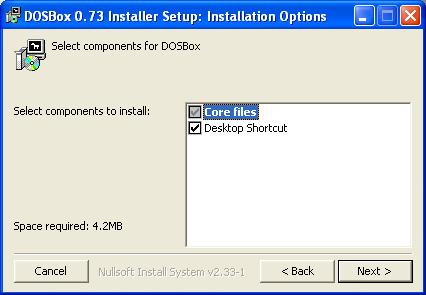
Nachdem der Download abgeschlossen ist, beginnt die Installation.
(Natürlich
muss man die Lizenzvereinbarung akzeptieren)
Anschließend legt man den Installationspfad fest:
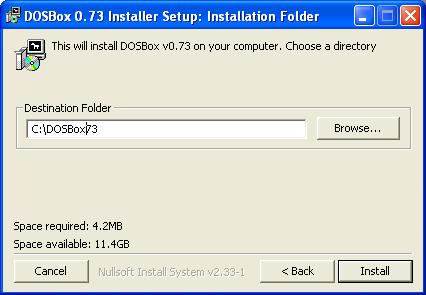
(Für
eine totale Pfadangabe sollte man den Verzeichnisnamen der
Einfachheit zur Liebe bei höchstens 8 Zeichen halten, dazu
später Genaueres =-D)
Nun läuft die Installation durch.
Als nächstes geht es über zu einem nicht wirklich so komplexen Aspekt:
Die Konfiguration!
Dieses Thema ist immer ein Schwerpunkt bei der Nutzung der DOSBox.
Ich werde hier eine gute Konfiguration erstellen, die universell Nutzbar ist.
Zuerst einmal muss man die Konfigurationsdatei erstellen. Dazu führt man die DOSBox aus.
Die DOSBox besteht aus zwei Fenstern, einmal einem Statusfenster, welches zum Beispiel Shell redirects zu erkennen gibt und dann natürlich der Arbeitsumgebung.
In der DOSBox gibt man nun folgenden Befehl ein:
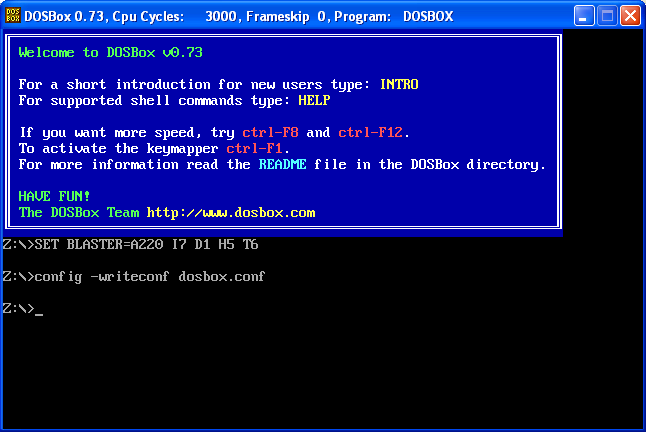
Dadurch wird die Datei dosbox.conf im Arbeitsverzeichnis erstellt.
Nun beendet man zunächst die DOSBox mit dem Befehl 'exit'.
Als nächstes muss dann die Konfigurationsdatei bearbeitet werden.
Hier die Konfigurationsdatei:
# This is the configurationfile for DOSBox 0.73.
# Lines starting with a # are commentlines.
# They are used to (briefly) document the effect of each option.
[sdl]
# fullscreen: Start dosbox directly in fullscreen.
# fulldouble: Use double buffering in fullscreen.
# fullresolution: What resolution to use for fullscreen: original or fixed size (e.g. 1024x768).
# windowresolution: Scale the window to this size IF the output device supports hardware scaling.
# output: What video system to use for output.
# Possible values: surface, overlay, opengl, openglnb, ddraw.
# autolock: Mouse will automatically lock, if you click on the screen.
# sensitivity: Mouse sensitivity.
# waitonerror: Wait before closing the console if dosbox has an error.
# priority: Priority levels for dosbox. Second entry behind the comma is for when dosbox is not focused/minimized. (pause is only valid for the second entry)
# Possible values: lowest, lower, normal, higher, highest, pause.
# mapperfile: File used to load/save the key/event mappings from.
# usescancodes: Avoid usage of symkeys, might not work on all operating systems.
fullscreen=true
fulldouble=false
fullresolution=1024x768
windowresolution=original
output=ddraw
autolock=true
sensitivity=100
waitonerror=true
priority=higher,normal
mapperfile=mapper.txt
usescancodes=true
[dosbox]
# language: Select another language file.
# machine: The type of machine tries to emulate.
# Possible values: hercules, cga, tandy, pcjr, ega, vgaonly, svga_s3, svga_et3000, svga_et4000, svga_paradise, vesa_nolfb, vesa_oldvbe.
# captures: Directory where things like wave, midi, screenshot get captured.
# memsize: Amount of memory DOSBox has in megabytes.
# This value is best left at its default to avoid problems with some games,
# though few games might require a higher value.
# There is generally no speed advantage when raising this value.
language=
machine=svga_s3
captures=capture
memsize=32
[render]
# frameskip: How many frames DOSBox skips before drawing one.
# aspect: Do aspect correction, if your output method doesn't support scaling this can slow things down!.
# scaler: Scaler used to enlarge/enhance low resolution modes. If 'forced' is appended,the scaler will be used even if the result might not be desired.
# Possible values: none, normal2x, normal3x, advmame2x, advmame3x, advinterp2x, advinterp3x, hq2x, hq3x, 2xsai, super2xsai, supereagle, tv2x, tv3x, rgb2x, rgb3x, scan2x, scan3x.
frameskip=0
aspect=true
scaler=normal2x
[cpu]
# core: CPU Core used in emulation. auto will switch to dynamic if available and appropriate.
# Possible values: auto, dynamic, normal, simple.
# cputype: CPU Type used in emulation. auto is the fastest choice.
# Possible values: auto, 386, 386_slow, 486_slow, pentium_slow, 386_prefetch.
# cycles: Amount of instructions DOSBox tries to emulate each millisecond. Setting this value too high results in sound dropouts and lags. Cycles can be set in 3 ways:
# 'auto' tries to guess what a game needs.
# It usually works, but can fail for certain games.
# 'fixed #number' will set a fixed amount of cycles. This is what you usually need if 'auto' fails.
# (Example: fixed 4000)
# 'max' will allocate as much cycles as your computer is able to handle
#
# Possible values: auto, fixed, max.
# cycleup: Amount of cycles to increase/decrease with keycombo.
# cycledown: Setting it lower than 100 will be a percentage.
core=auto
cputype=auto
cycles=auto
cycleup=500
cycledown=20
[mixer]
# nosound: Enable silent mode, sound is still emulated though.
# rate: Mixer sample rate, setting any device's rate higher than this will probably lower their sound quality.
# Possible values: 22050, 44100, 48000, 32000, 16000, 11025, 8000, 49716.
# blocksize: Mixer block size, larger blocks might help sound stuttering but sound will also be more lagged.
# Possible values: 2048, 4096, 8192, 1024, 512, 256.
# prebuffer: How many milliseconds of data to keep on top of the blocksize.
nosound=false
rate=22050
blocksize=2048
prebuffer=10
[midi]
# mpu401: Type of MPU-401 to emulate.
# Possible values: intelligent, uart, none.
# mididevice: Device that will receive the MIDI data from MPU-401.
# Possible values: default, win32, alsa, oss, coreaudio, coremidi, none.
# midiconfig: Special configuration options for the device driver. This is usually the id of the device you want to use. See README for details.
mpu401=intelligent
mididevice=default
midiconfig=
[sblaster]
# sbtype: Type of sblaster to emulate.
# Possible values: sb1, sb2, sbpro1, sbpro2, sb16, none.
# sbbase: The IO address of the soundblaster.
# Possible values: 220, 240, 260, 280, 2a0, 2c0, 2e0, 300.
# irq: The IRQ number of the soundblaster.
# Possible values: 7, 5, 3, 9, 10, 11, 12.
# dma: The DMA number of the soundblaster.
# Possible values: 1, 5, 0, 3, 6, 7.
# hdma: The High DMA number of the soundblaster.
# Possible values: 1, 5, 0, 3, 6, 7.
# sbmixer: Allow the soundblaster mixer to modify the DOSBox mixer.
# oplmode: Type of OPL emulation. On 'auto' the mode is determined by sblaster type. All OPL modes are Adlib-compatible, except for 'cms'.
# Possible values: auto, cms, opl2, dualopl2, opl3, none.
# oplemu: Provider for the OPL emulation. compat or old might provide better quality (see oplrate as well).
# Possible values: default, compat, fast, old.
# oplrate: Sample rate of OPL music emulation. Use 49716 for highest quality (set the mixer rate accordingly).
# Possible values: 22050, 49716, 44100, 48000, 32000, 16000, 11025, 8000.
sbtype=sb16
sbbase=220
irq=5
dma=1
hdma=5
sbmixer=true
oplmode=auto
oplemu=default
oplrate=22050
[gus]
# gus: Enable the Gravis Ultrasound emulation.
# gusrate: Sample rate of Ultrasound emulation.
# Possible values: 22050, 44100, 48000, 32000, 16000, 11025, 8000, 49716.
# gusbase: The IO base address of the Gravis Ultrasound.
# Possible values: 240, 220, 260, 280, 2a0, 2c0, 2e0, 300.
# gusirq: The IRQ number of the Gravis Ultrasound.
# Possible values: 5, 3, 7, 9, 10, 11, 12.
# gusdma: The DMA channel of the Gravis Ultrasound.
# Possible values: 3, 0, 1, 5, 6, 7.
# ultradir: Path to Ultrasound directory. In this directory
# there should be a MIDI directory that contains
# the patch files for GUS playback. Patch sets used
# with Timidity should work fine.
gus=false
gusrate=22050
gusbase=240
gusirq=5
gusdma=3
ultradir=C:\ULTRASND
[speaker]
# pcspeaker: Enable PC-Speaker emulation.
# pcrate: Sample rate of the PC-Speaker sound generation.
# Possible values: 22050, 44100, 48000, 32000, 16000, 11025, 8000, 49716.
# tandy: Enable Tandy Sound System emulation. For 'auto', emulation is present only if machine is set to 'tandy'.
# Possible values: auto, on, off.
# tandyrate: Sample rate of the Tandy 3-Voice generation.
# Possible values: 22050, 44100, 48000, 32000, 16000, 11025, 8000, 49716.
# disney: Enable Disney Sound Source emulation. (Covox Voice Master and Speech Thing compatible).
pcspeaker=true
pcrate=22050
tandy=auto
tandyrate=22050
disney=true
[joystick]
# joysticktype: Type of joystick to emulate: auto (default), none,
# 2axis (supports two joysticks),
# 4axis (supports one joystick, first joystick used),
# 4axis_2 (supports one joystick, second joystick used),
# fcs (Thrustmaster), ch (CH Flightstick).
# none disables joystick emulation.
# auto chooses emulation depending on real joystick(s).
# Possible values: auto, 2axis, 4axis, 4axis_2, fcs, ch, none.
# timed: enable timed intervals for axis. (false is old style behaviour).
# autofire: continuously fires as long as you keep the button pressed.
# swap34: swap the 3rd and the 4th axis. can be useful for certain joysticks.
# buttonwrap: enable button wrapping at the number of emulated buttons.
joysticktype=auto
timed=true
autofire=false
swap34=false
buttonwrap=true
[serial]
# serial1: set type of device connected to com port.
# Can be disabled, dummy, modem, nullmodem, directserial.
# Additional parameters must be in the same line in the form of
# parameter:value. Parameter for all types is irq.
# for directserial: realport (required), rxdelay (optional).
# (realport:COM1 realport:ttyS0).
# for modem: listenport (optional).
# for nullmodem: server, rxdelay, txdelay, telnet, usedtr,
# transparent, port, inhsocket (all optional).
# Example: serial1=modem listenport:5000
# Possible values: dummy, disabled, modem, nullmodem, directserial.
# serial2: see serial1
# Possible values: dummy, disabled, modem, nullmodem, directserial.
# serial3: see serial1
# Possible values: dummy, disabled, modem, nullmodem, directserial.
# serial4: see serial1
# Possible values: dummy, disabled, modem, nullmodem, directserial.
serial1=dummy
serial2=dummy
serial3=disabled
serial4=disabled
[dos]
# xms: Enable XMS support.
# ems: Enable EMS support.
# umb: Enable UMB support.
# keyboardlayout: Language code of the keyboard layout (or none).
xms=true
ems=true
umb=true
keyboardlayout=auto
[ipx]
# ipx: Enable ipx over UDP/IP emulation.
ipx=false
[autoexec]
# Lines in this section will be run at startup.
mount c c:\dosbox73\data
c:
cls
Die Umgebungsparameter wie zum Beispiel die Auflösung muss jeder für sich einstellen.
Wichtig ist zum Beispiel die Autoexec-Sektion.
'mount' ist ein Befehl zum Einbinden eines realen Verzeichnisses in die Emulierte Umgebung.
Wie zu erkennen ist, steht hinter dem uns bekannten Pfad das Verzeichnis 'Data'.
Hier werden wir alle unsere Programme und Daten für die Nutzung mit DOSBox ablegen.
Der Ordner existiert nicht mit der Installation, deshalb muss er angelegt werden.
Weiter ist hier nichts zu erwähnen... noch nicht.
Das Einfügen von QBasic
Das Einfügen von QBasic ist nicht schwer. Ich gehe von der Version aus, die sich auch im Umfang der MS-DOS 6.22 Installationsdisketten befindet.
Diese wird einfach in einem neuen Verzeichnis eingefügt. Bei mir sieht die Verzeichnisstruktur so aus:
C:\DOSBOX73\DATA\QBASIC
Ihr könnt, wenn ihr QBasic zum Beipspiel in einem Archiv verpackt habt, diese einfach noch von außerhalb der Umgebung entpacken. Dann entpackt ihr einfach in das Verzeichnis 'Data'.
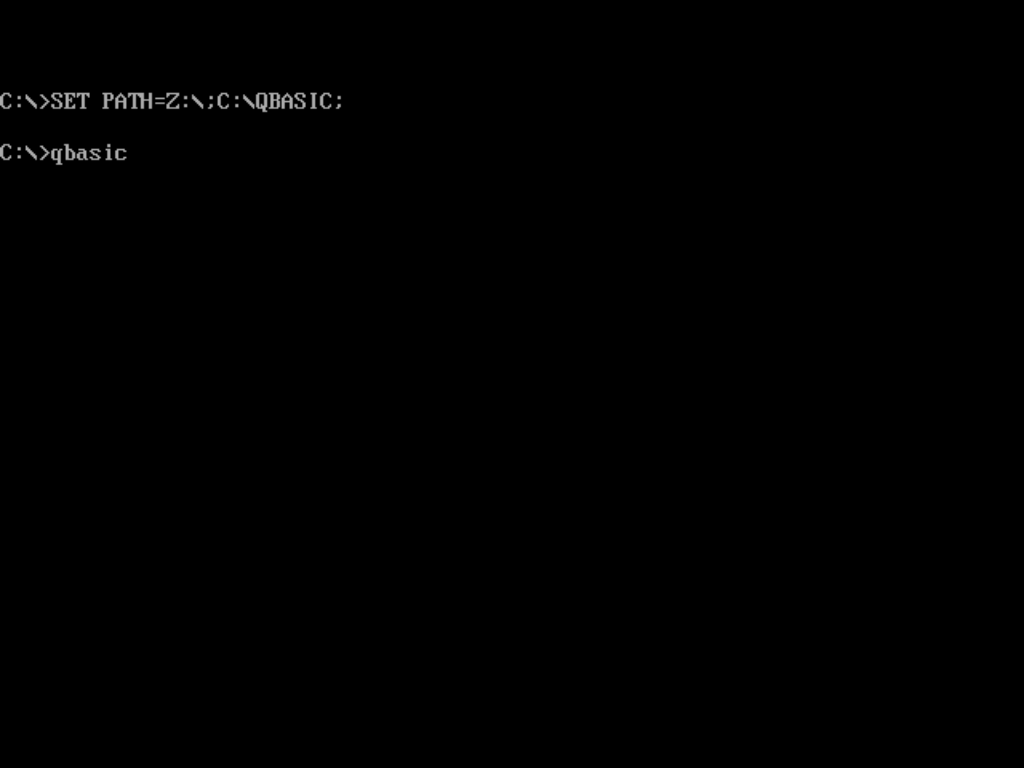
Wenn ihr allerdings sagen wir mal nur die Installationsdiskette von MS-DOS hab, dann müsst ihr das mitgelieferte Programm 'Expand' nutzen. Eine Hilfestellung ist enthalten. Nachdem Qbasic nun extrahiert ist, könnt ihr in eurer Konfigurationsdatei im Autoexec-Bereich noch folgendes einfügen, um zur Nutzung von QBasic nicht immer in das Verzeichnis wechseln zu müssen:
SET PATH=%PATH%;C:\QBASIC;
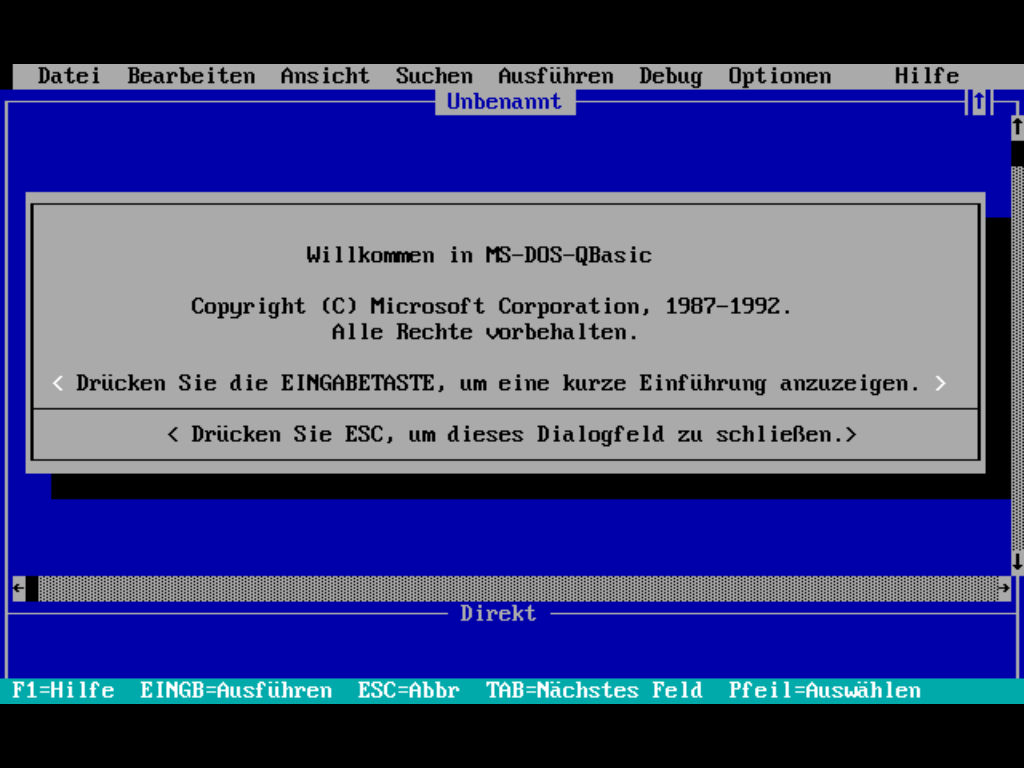
Anschließend könnt ihr gleich loslegen. Ihr startet eure DOSBox, und führt QBasic aus.